
My First DIY Acrylic Full Set
I have been getting my full set done professionally for years.
Recently I’ve been thinking about doing it myself since I’ve seen a few self-demos on the internet. I made a list of the basic tools I’d need and I took a trip to my nearby beauty supply store. All of the things I used cost ranged from 99 cents to 7.99. Depending on what store you get them from, the prices may vary.
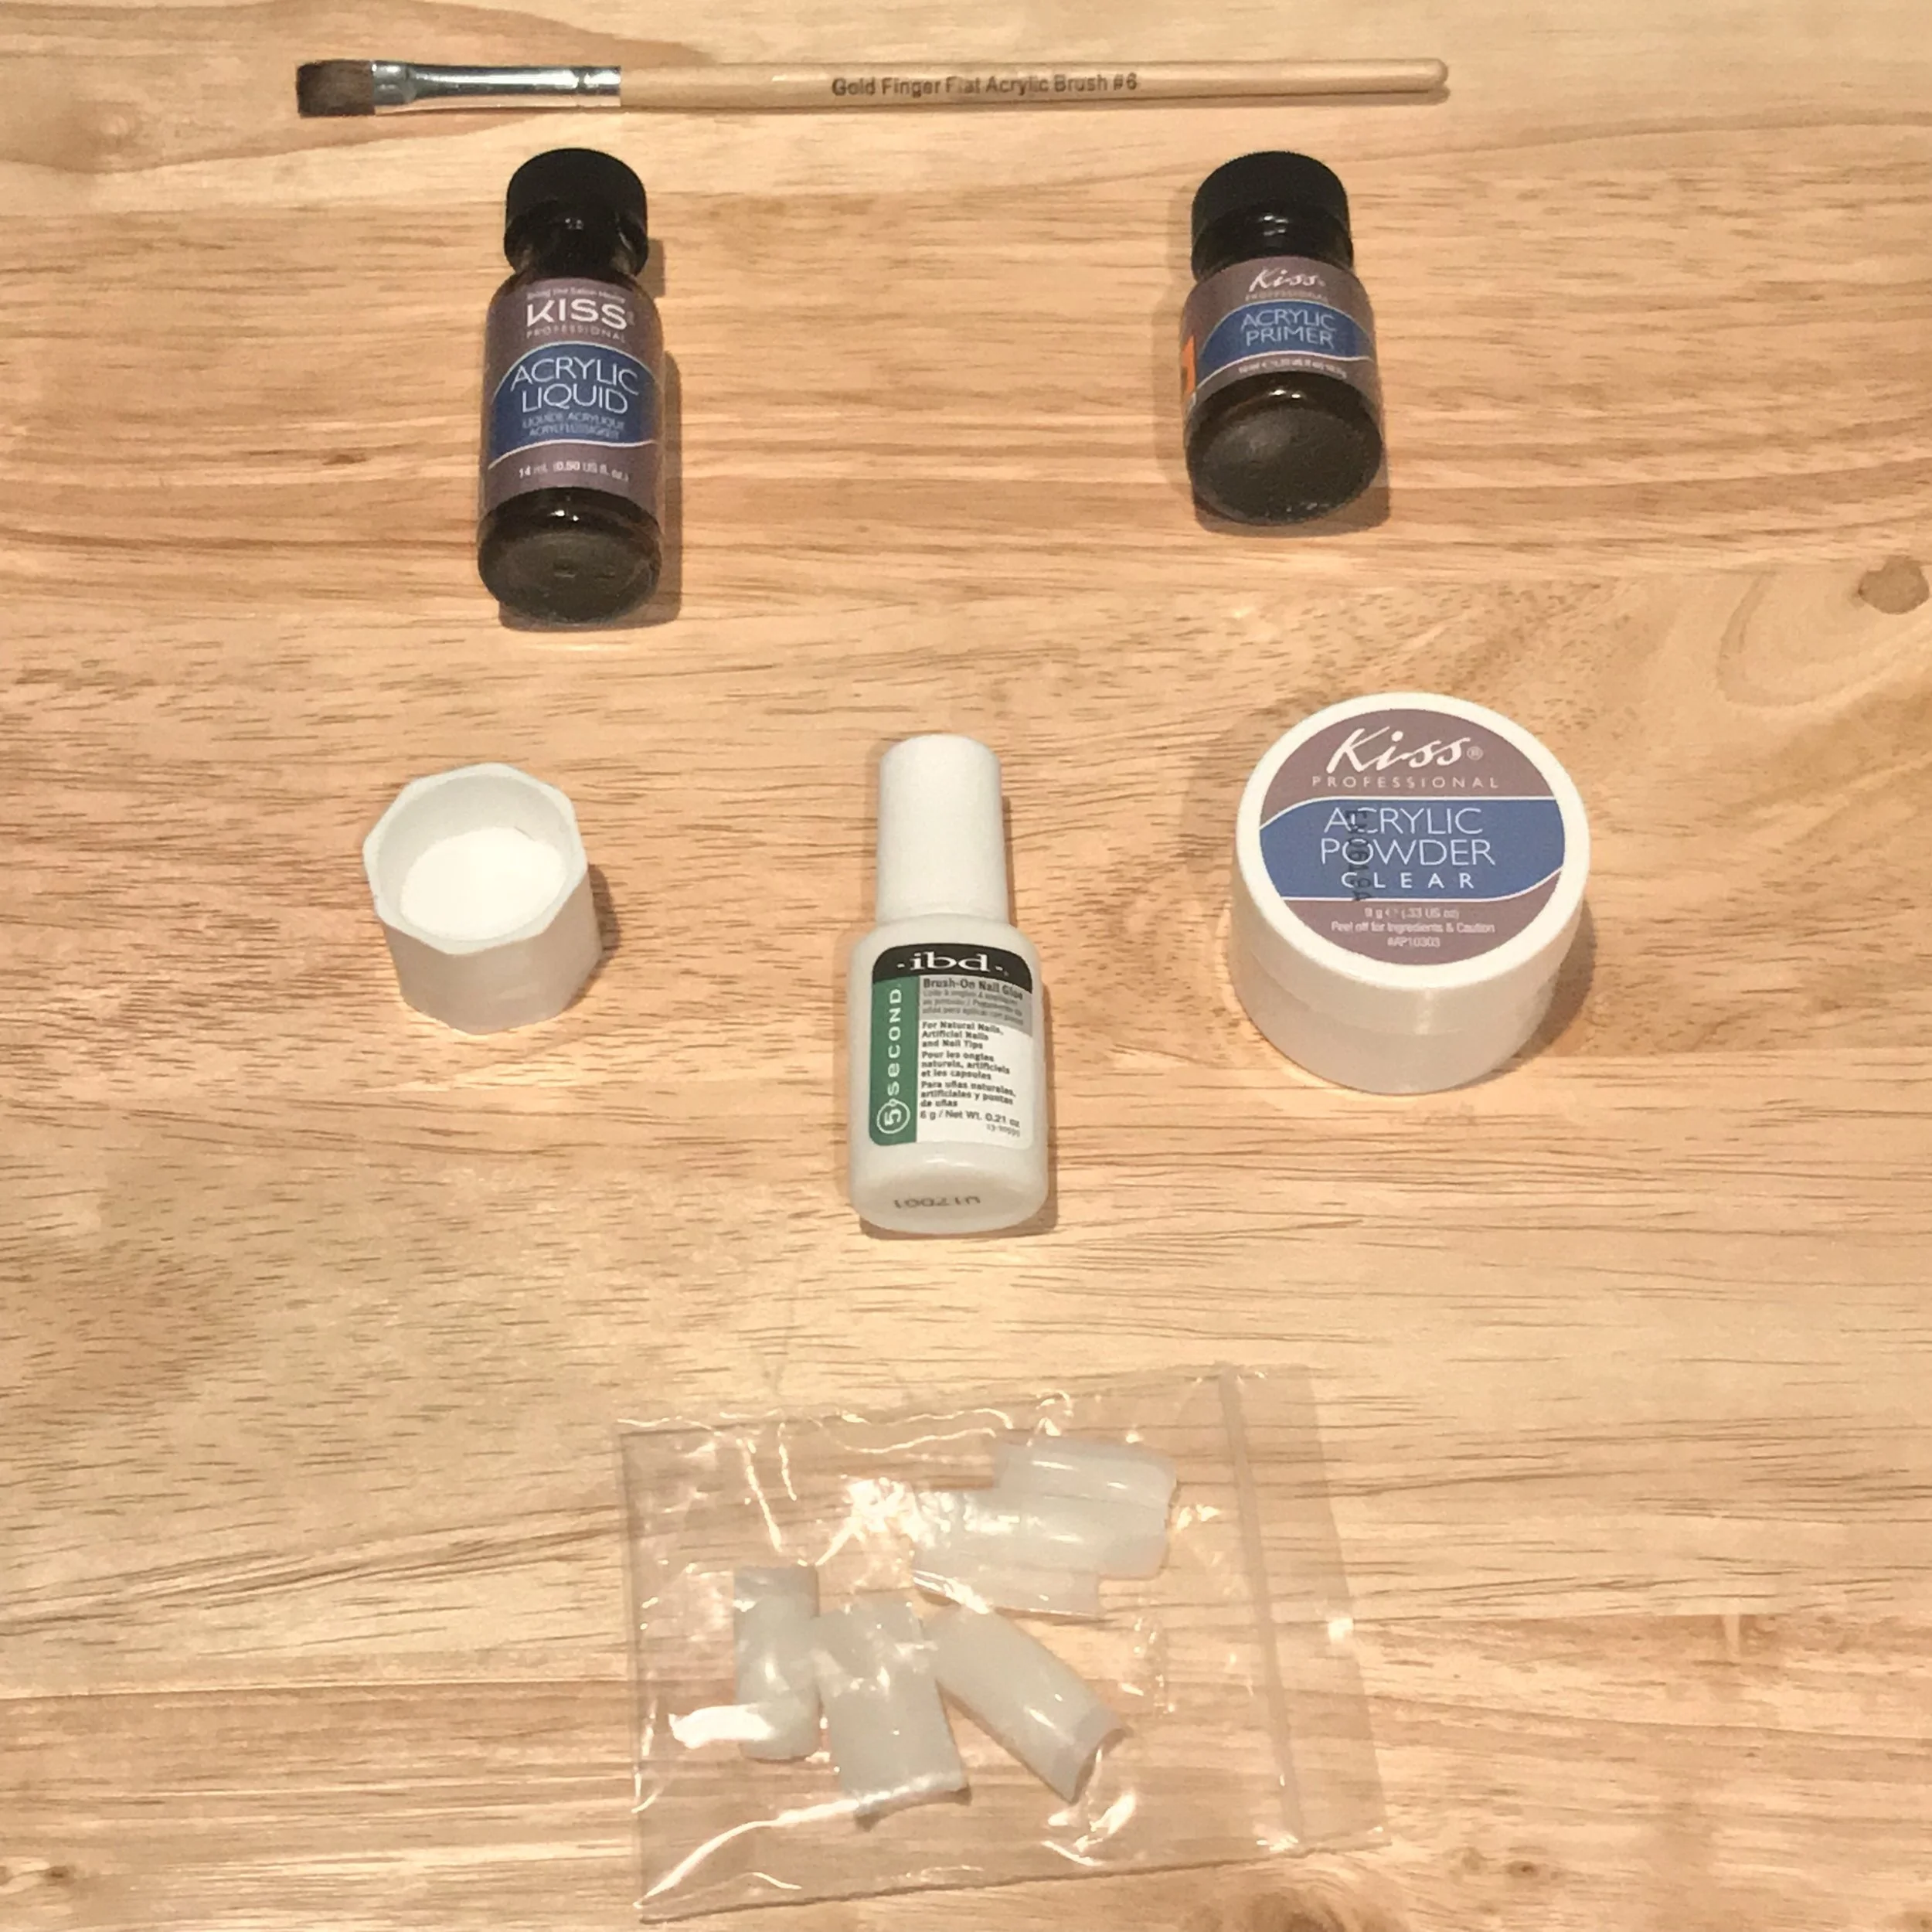
Above I have the application brush, the acrylic liquid, primer and powder in clear. The little white thing that I don’t know the name of, but you put the acrylic liquid into for dipping. Nail glue in a brush on form and a pack of twenty nails.
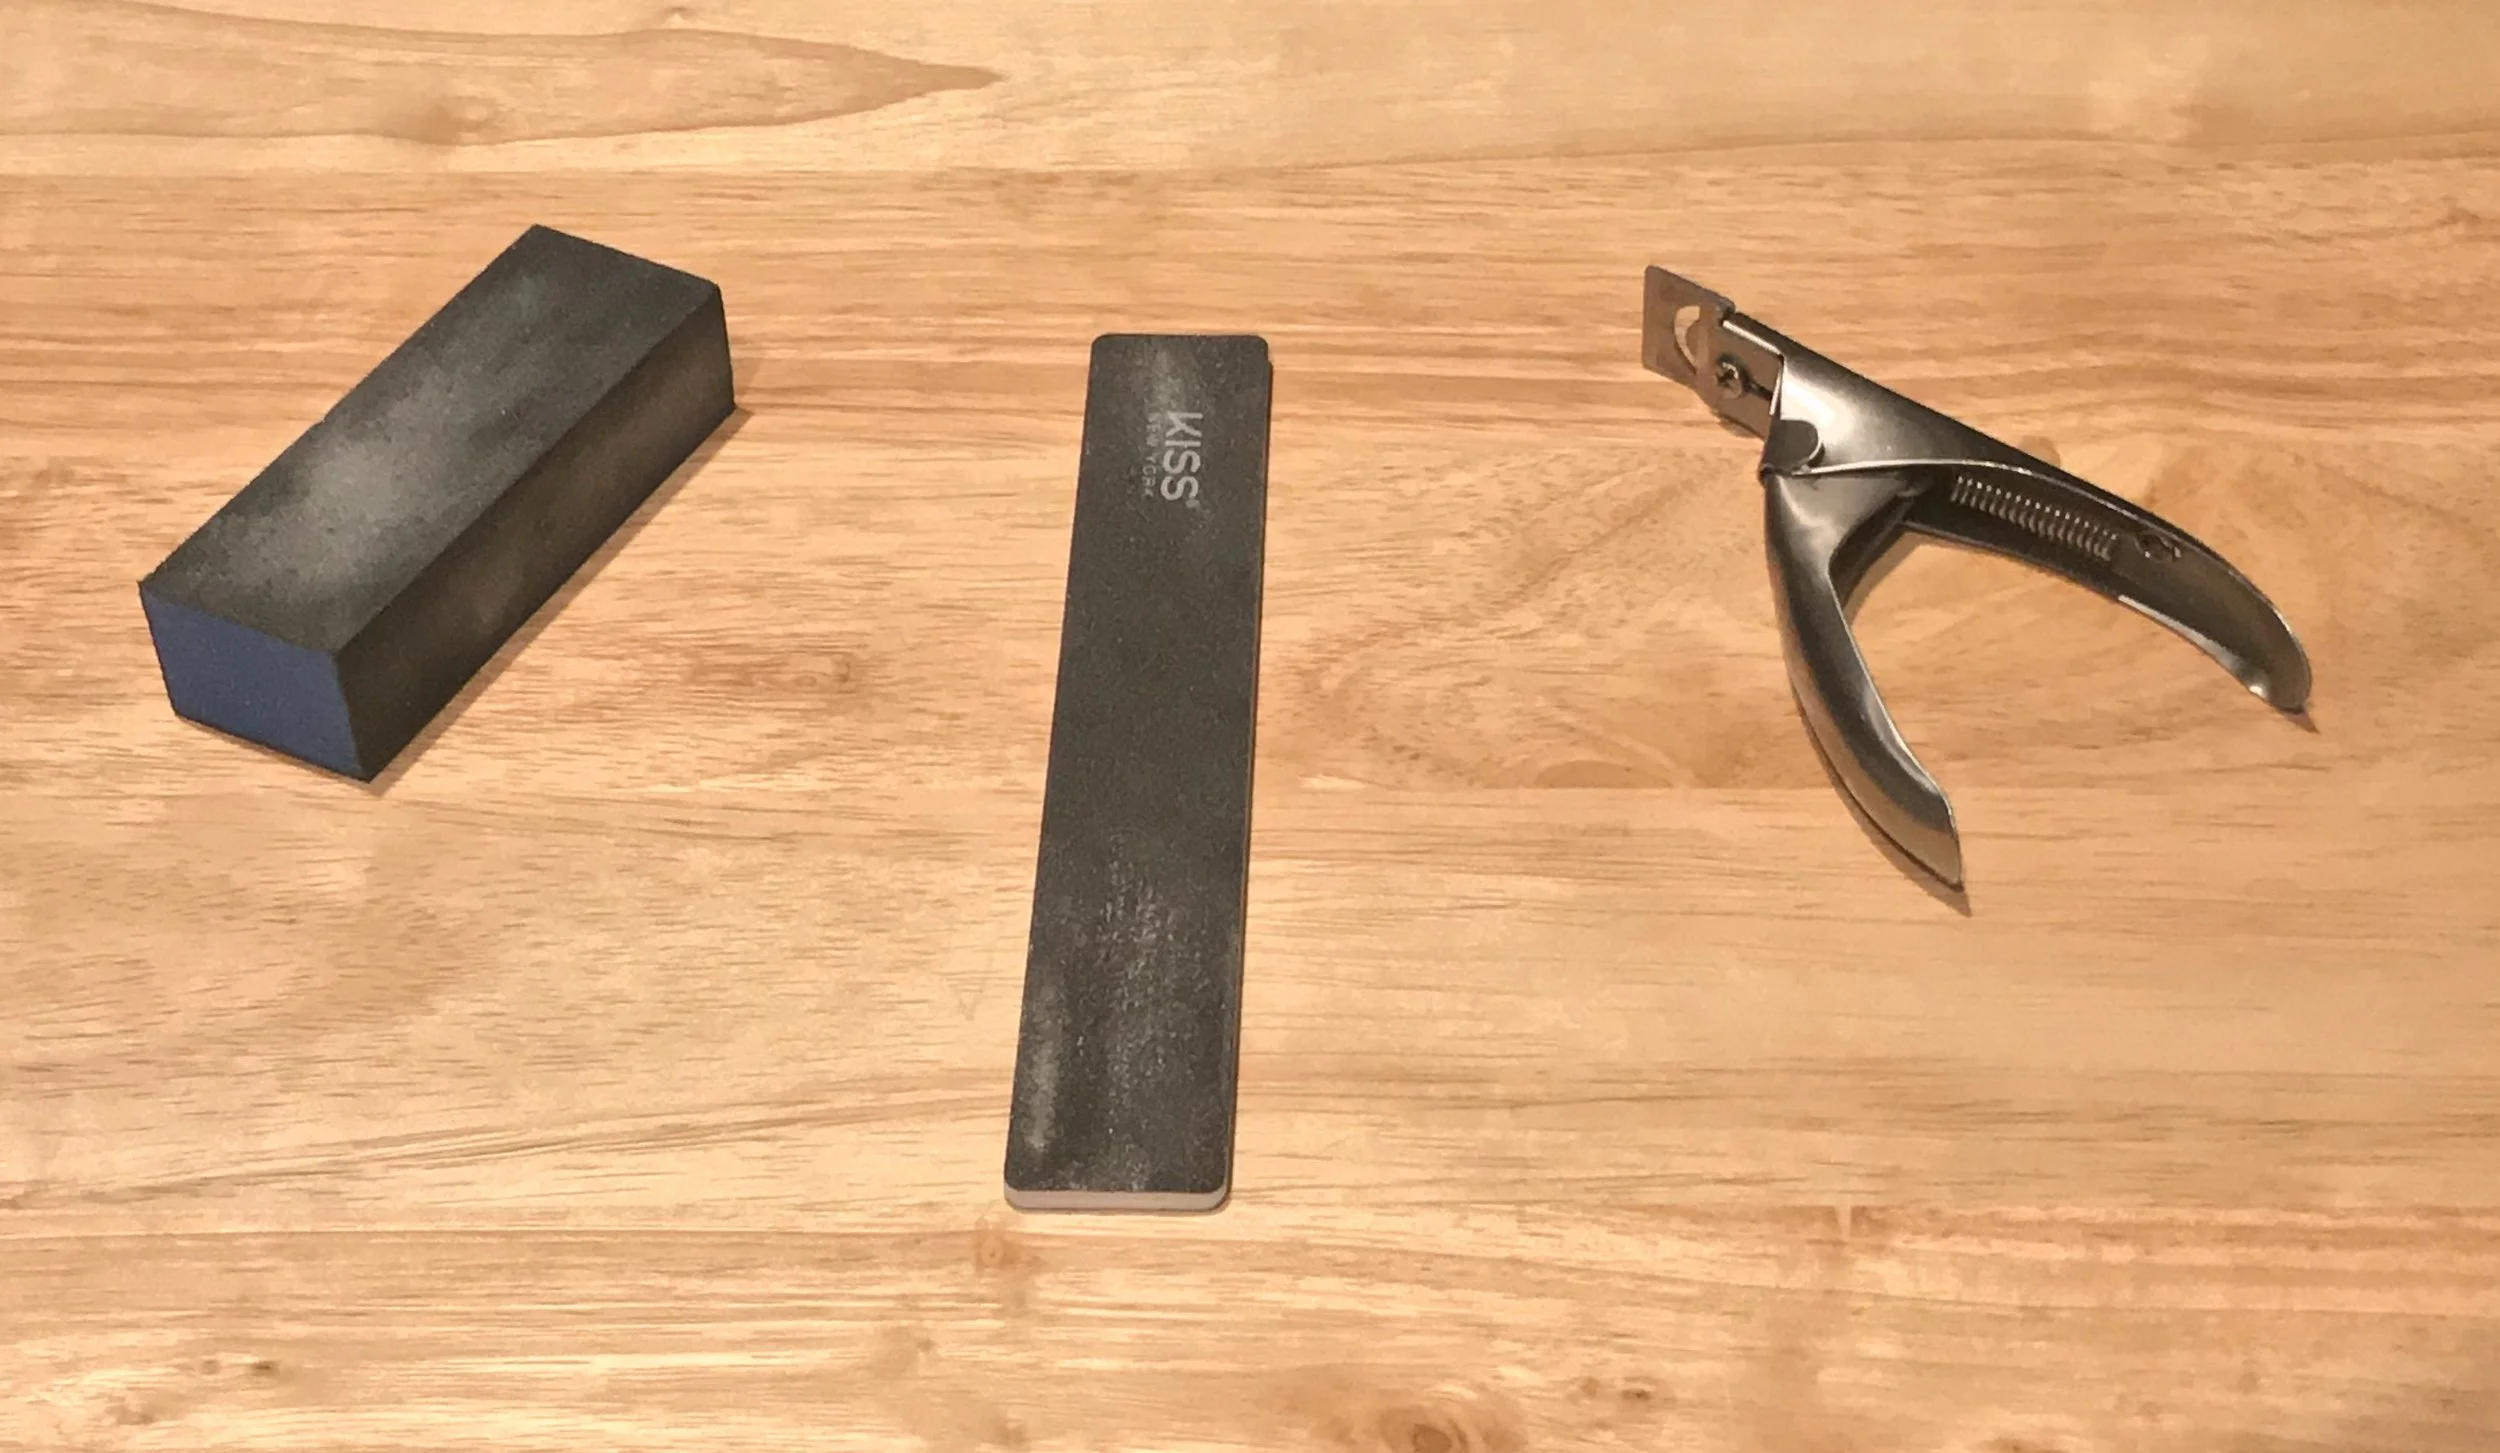
Now since I don’t have the fancy equipment that I usually see at the nail shop, I had to go with the traditional buffer, nail file and I found this nail clip.
I won’t give a tutorial because this is my first attempt; I’ll just show my step progression.
First, I used the rough part of the nail file to buff my natural nails down a bit to make it a little rough. Then I matched the extension nails to see which ones fit the natural ones and then I applied each one with the glue.
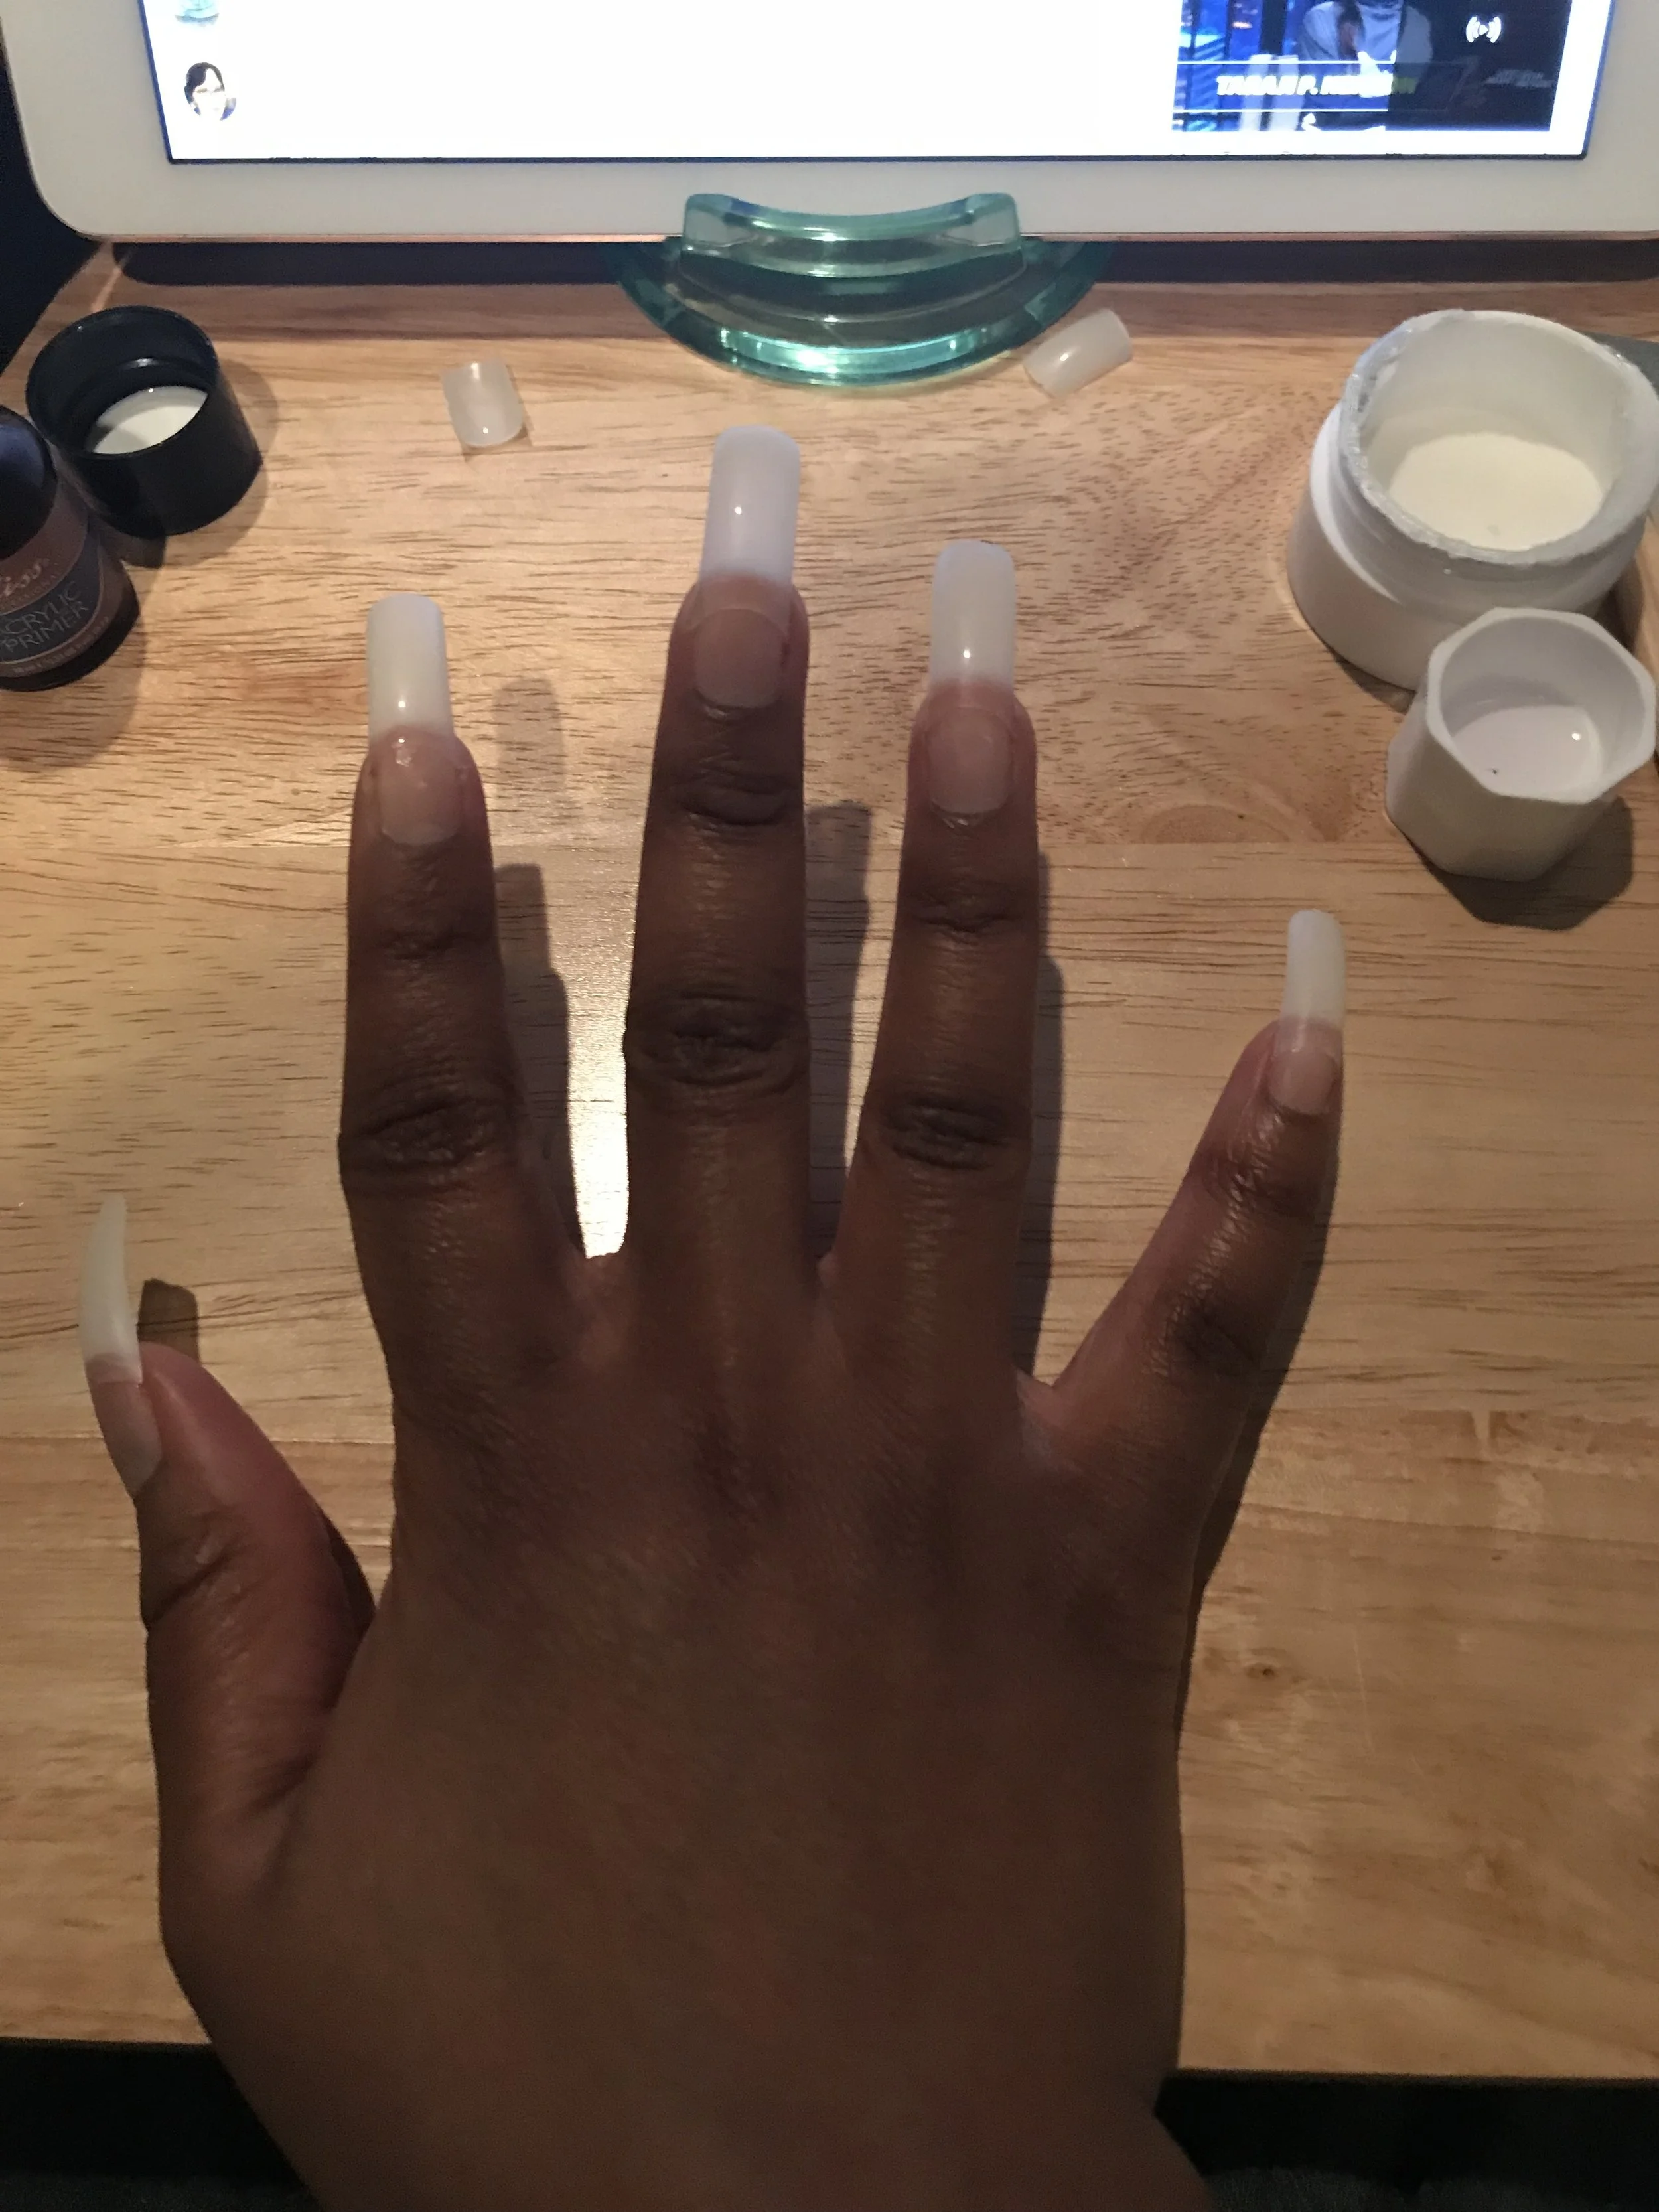
Next, I used the nail clip and to trim the nail down to my desired length. These days I prefer short nails so I went as short as I could.
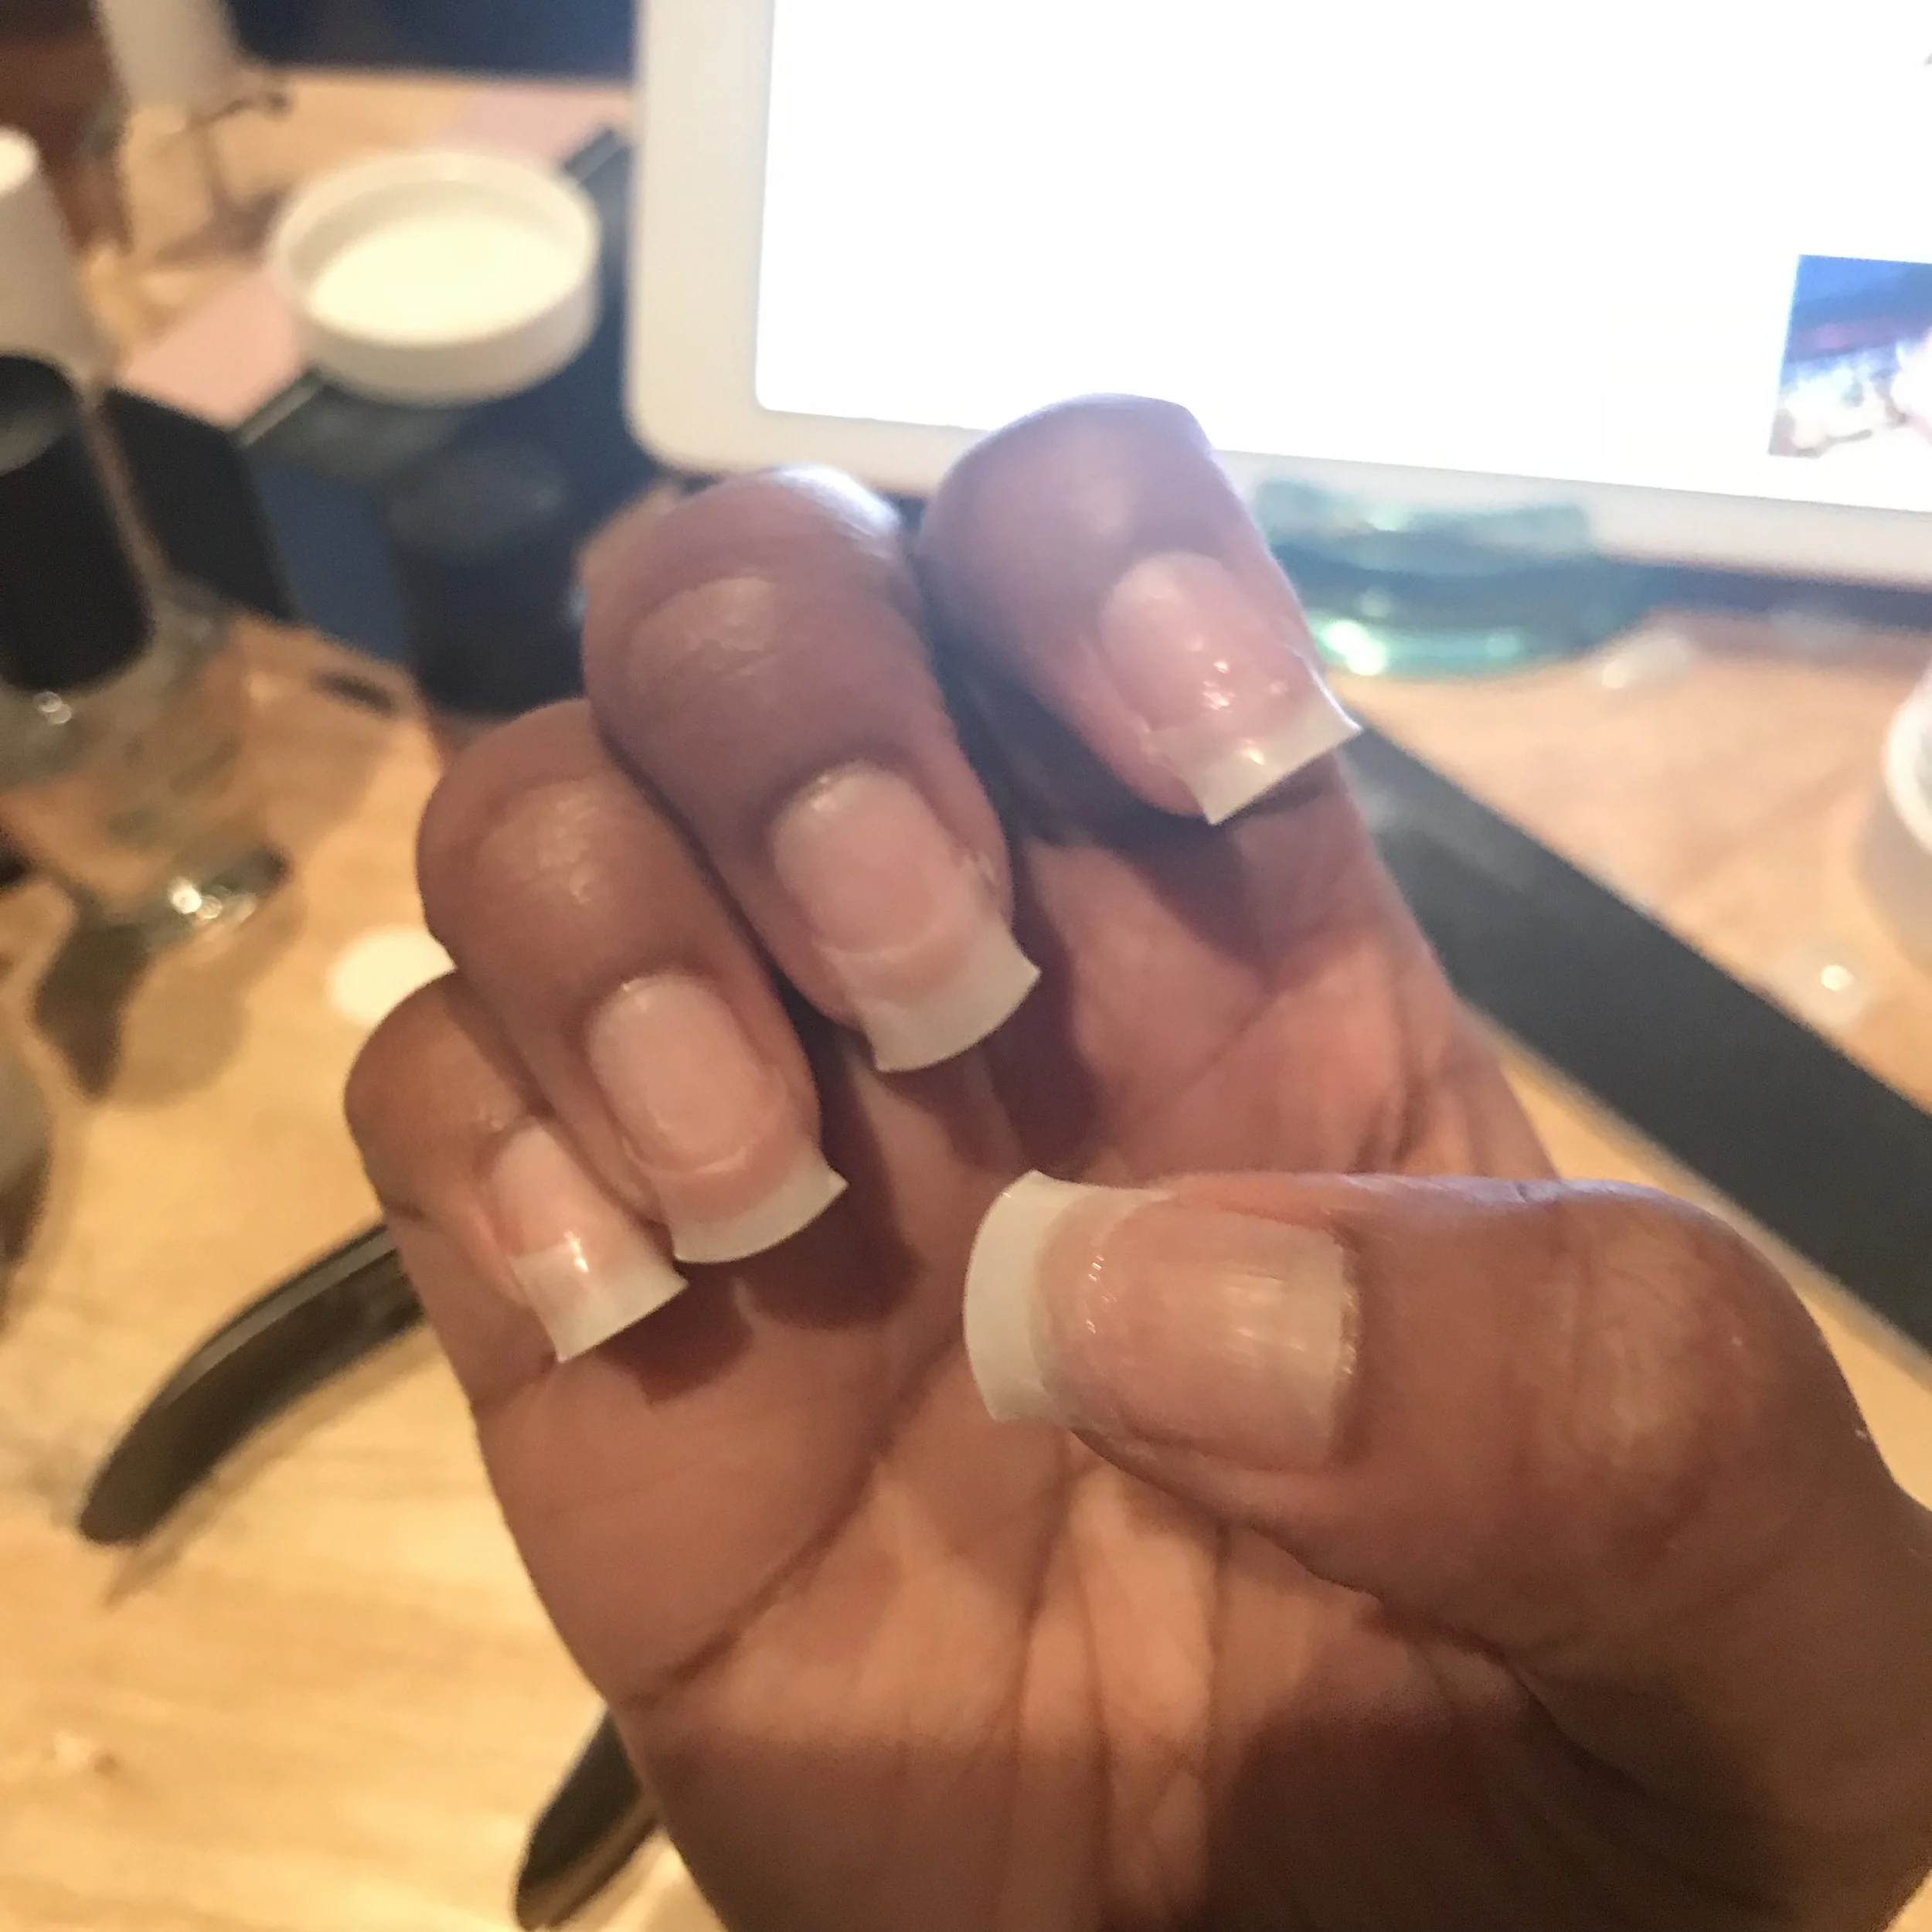
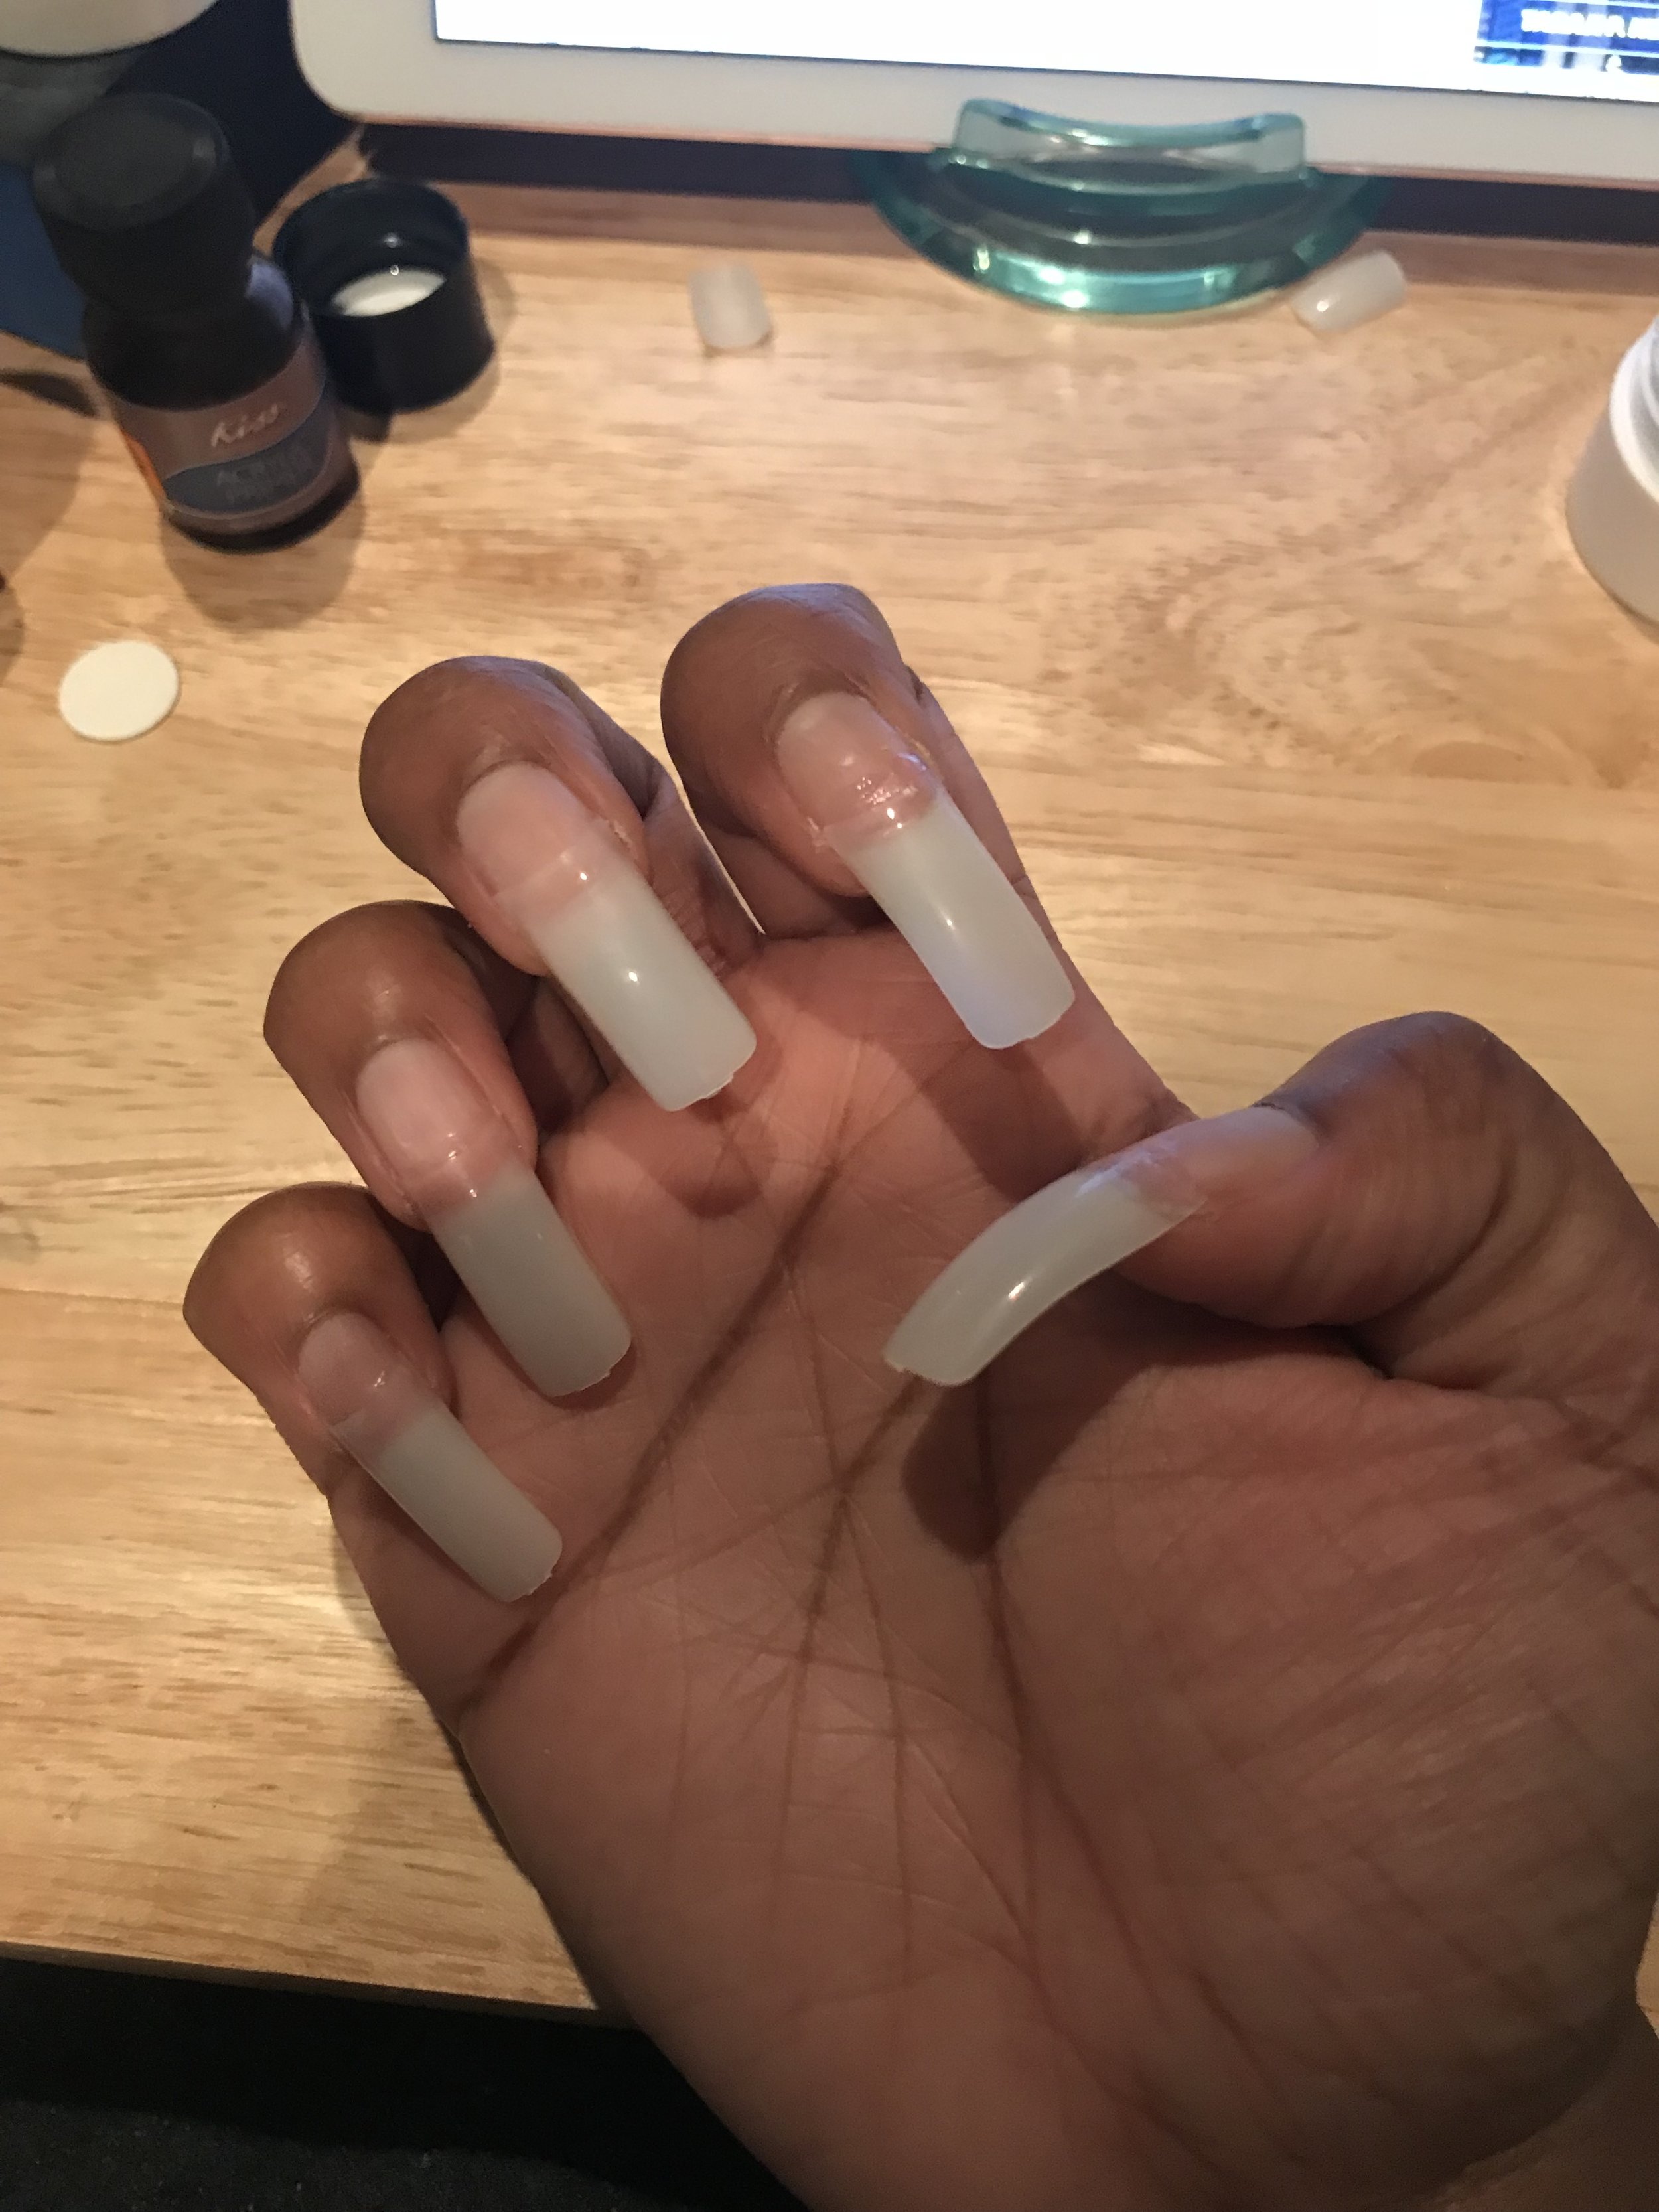
I then proceeded to apply the primer to my nails and then the acrylic. I poured the acrylic liquid into the little white cup and dipped the brush into it. I then dipped the brush into the acrylic powder and made a ball with the tip of the brush; just like I’ve seen them do at the nail shop a million times over, and applied it to each nail.

After the application and the acrylic is dried, I used the nail file to shape and buff the nail to how I wanted it. Usually, the nail shop they use the electric buffer thing to shape the base of the nail, but since I don’t have that device, the acrylic covered the cuticle.
Once I was finished with the left hand, I moved to the right and repeated the process.
To wrap up, I washed my hands to get rid of The excess dust from the filing. I dried and then applied my favourite cuticle balm to my nail and let it sit. I decided not to go with any nail polish, mostly because I couldn’t decide on a colour.
FINAL THOUGHTS
I think I did a pretty good job for my first real attempt at applying acrylics myself. I think they look great.
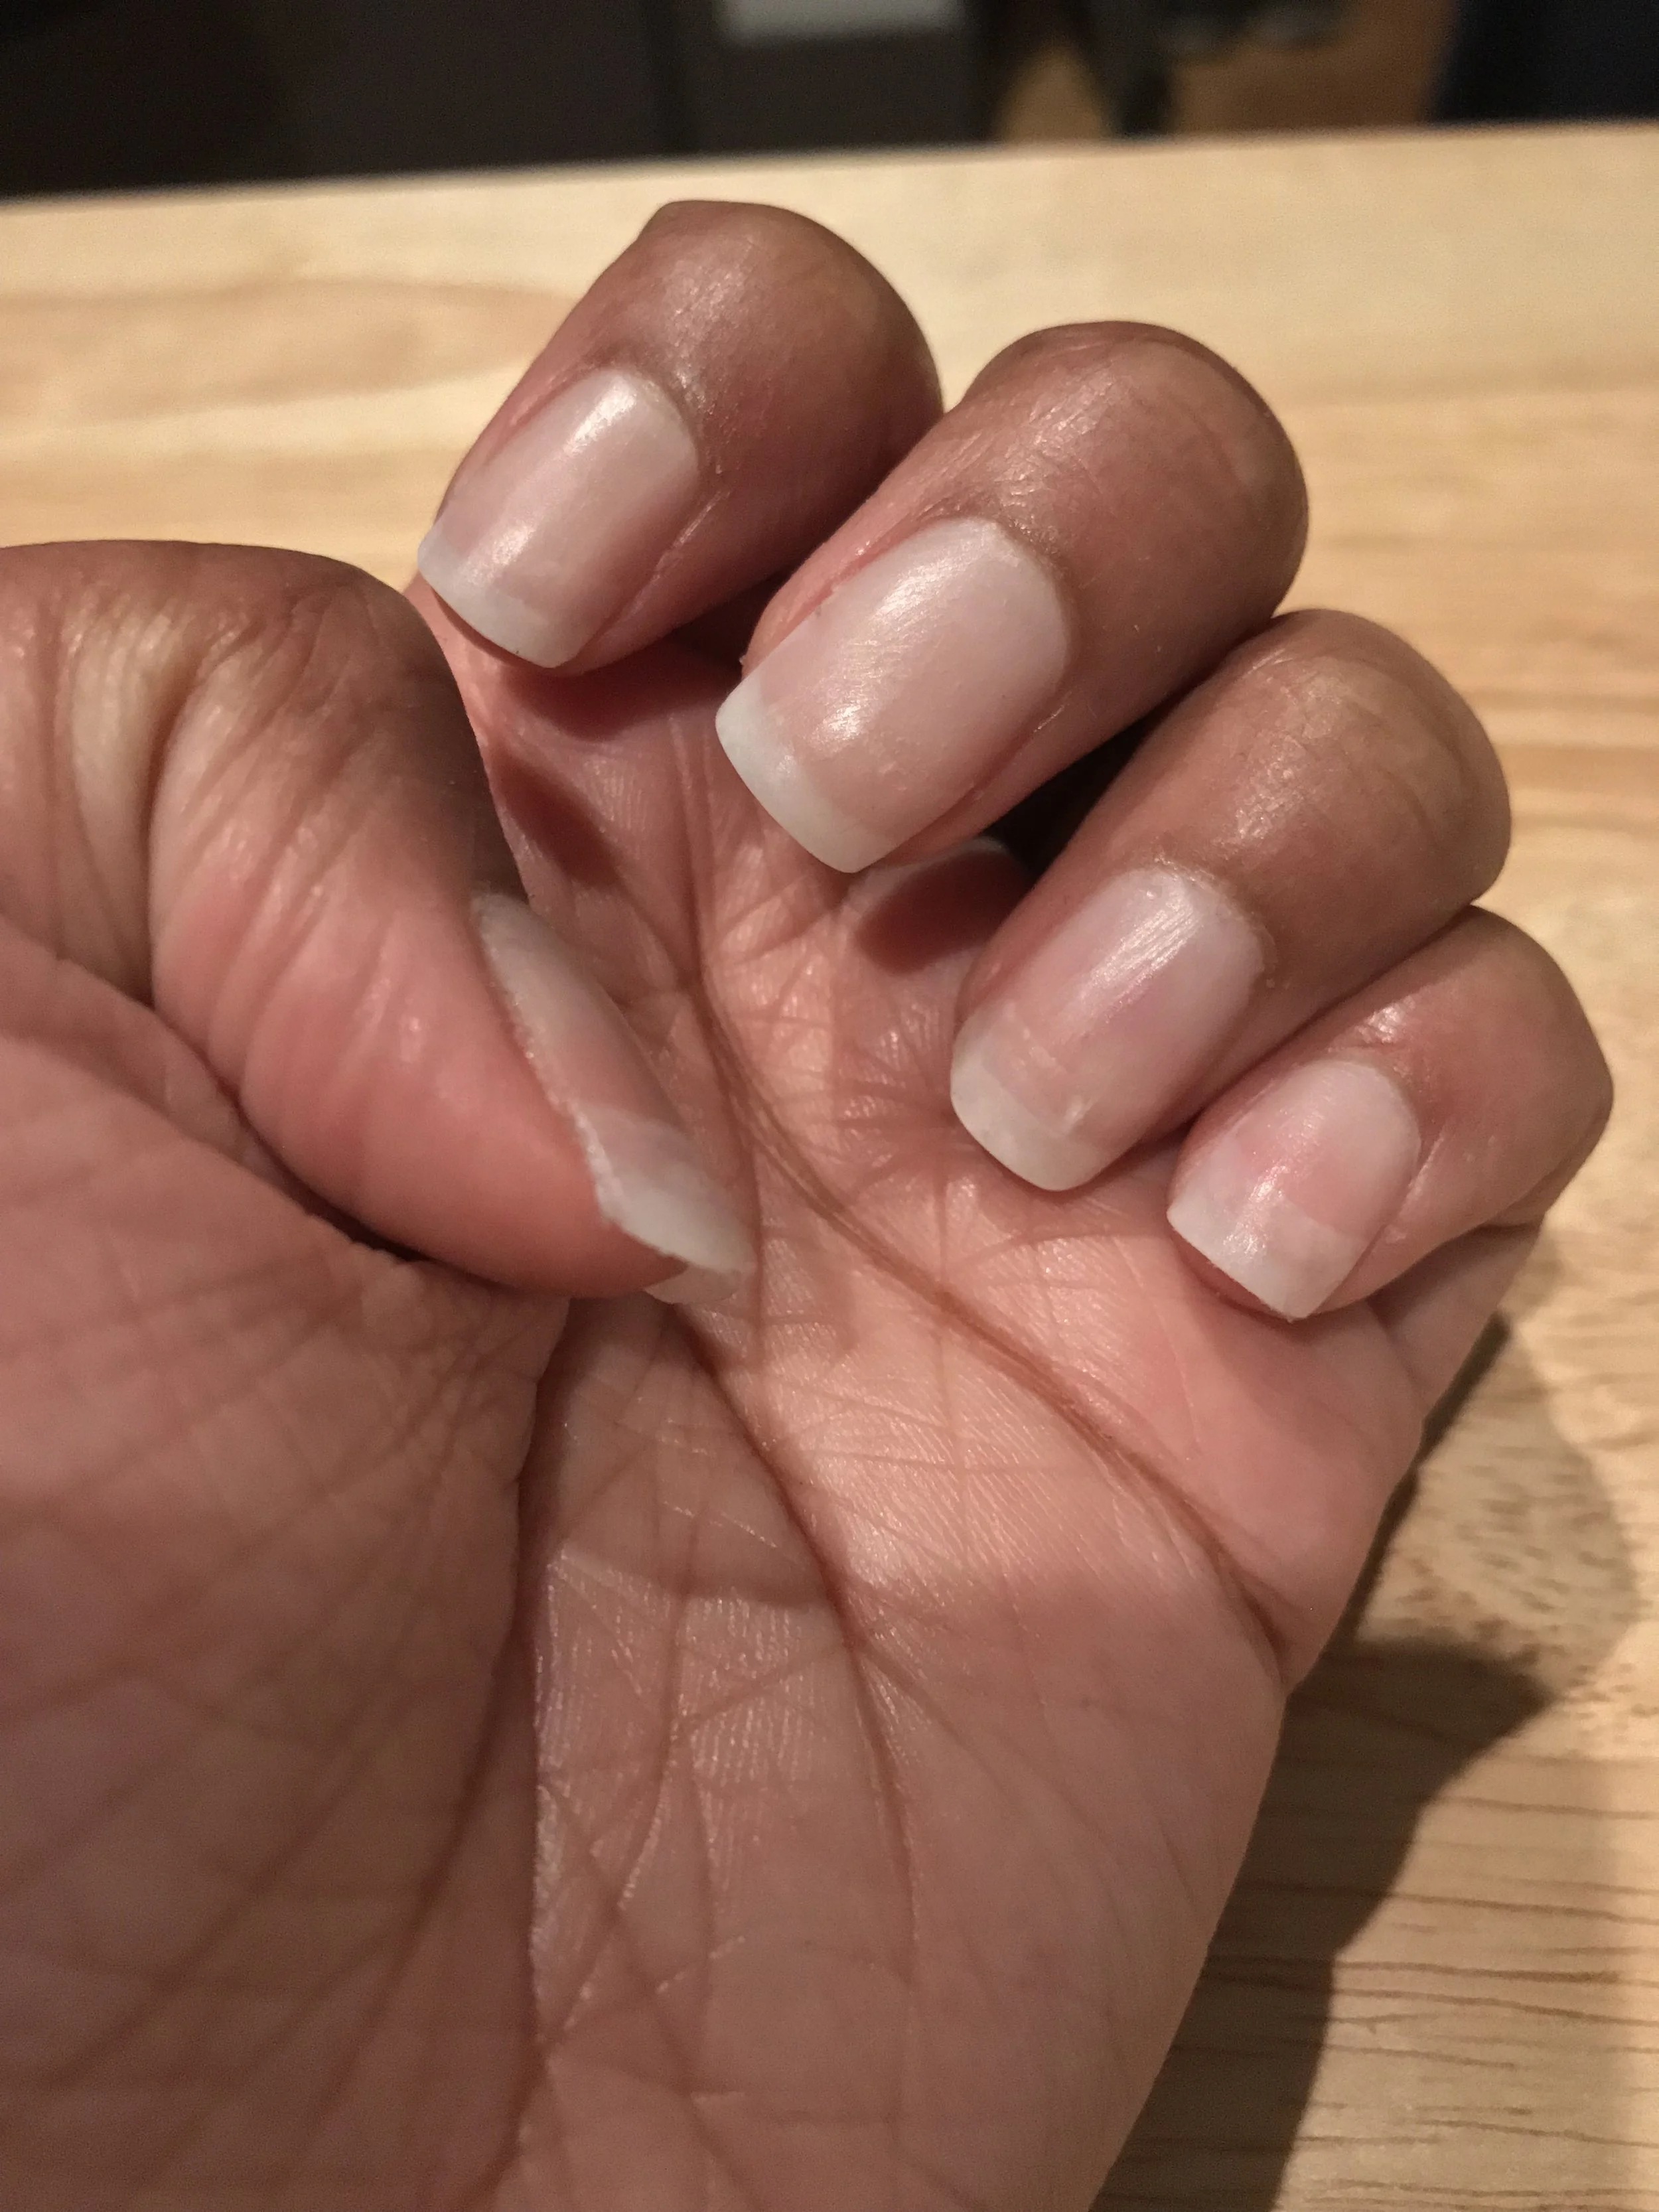
Here’s the final product on my left hand...
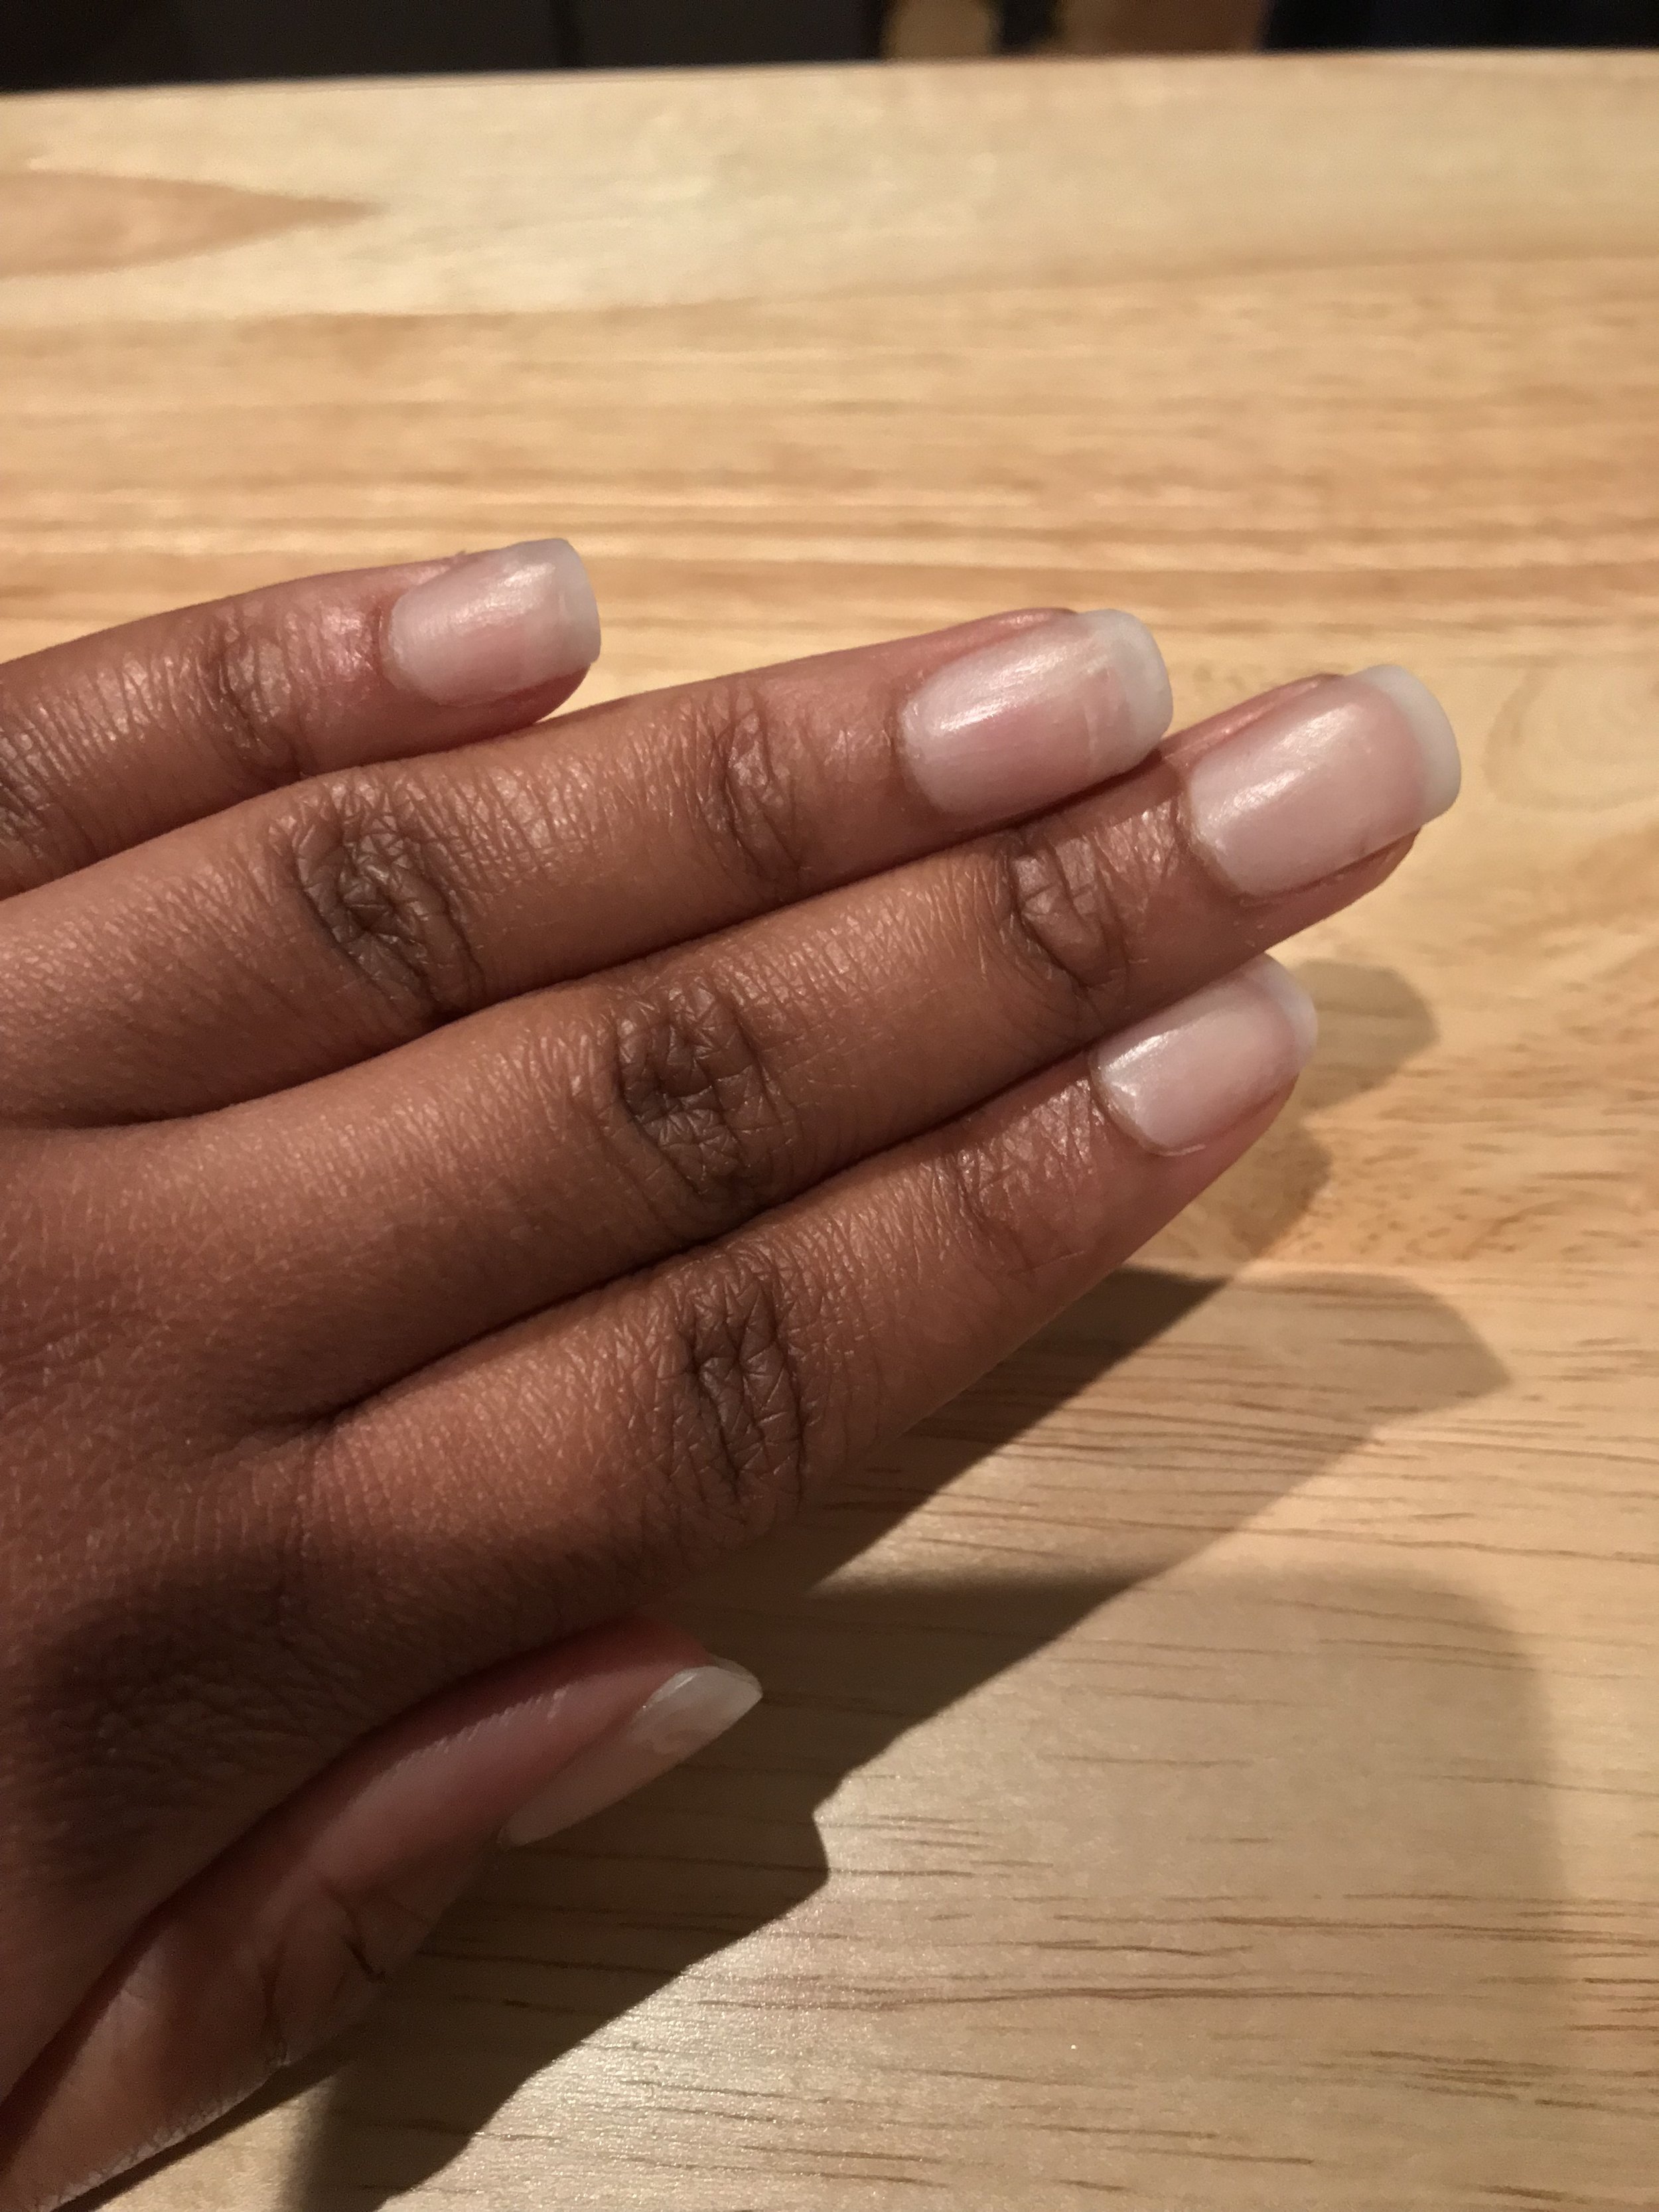
Vs my right hand.

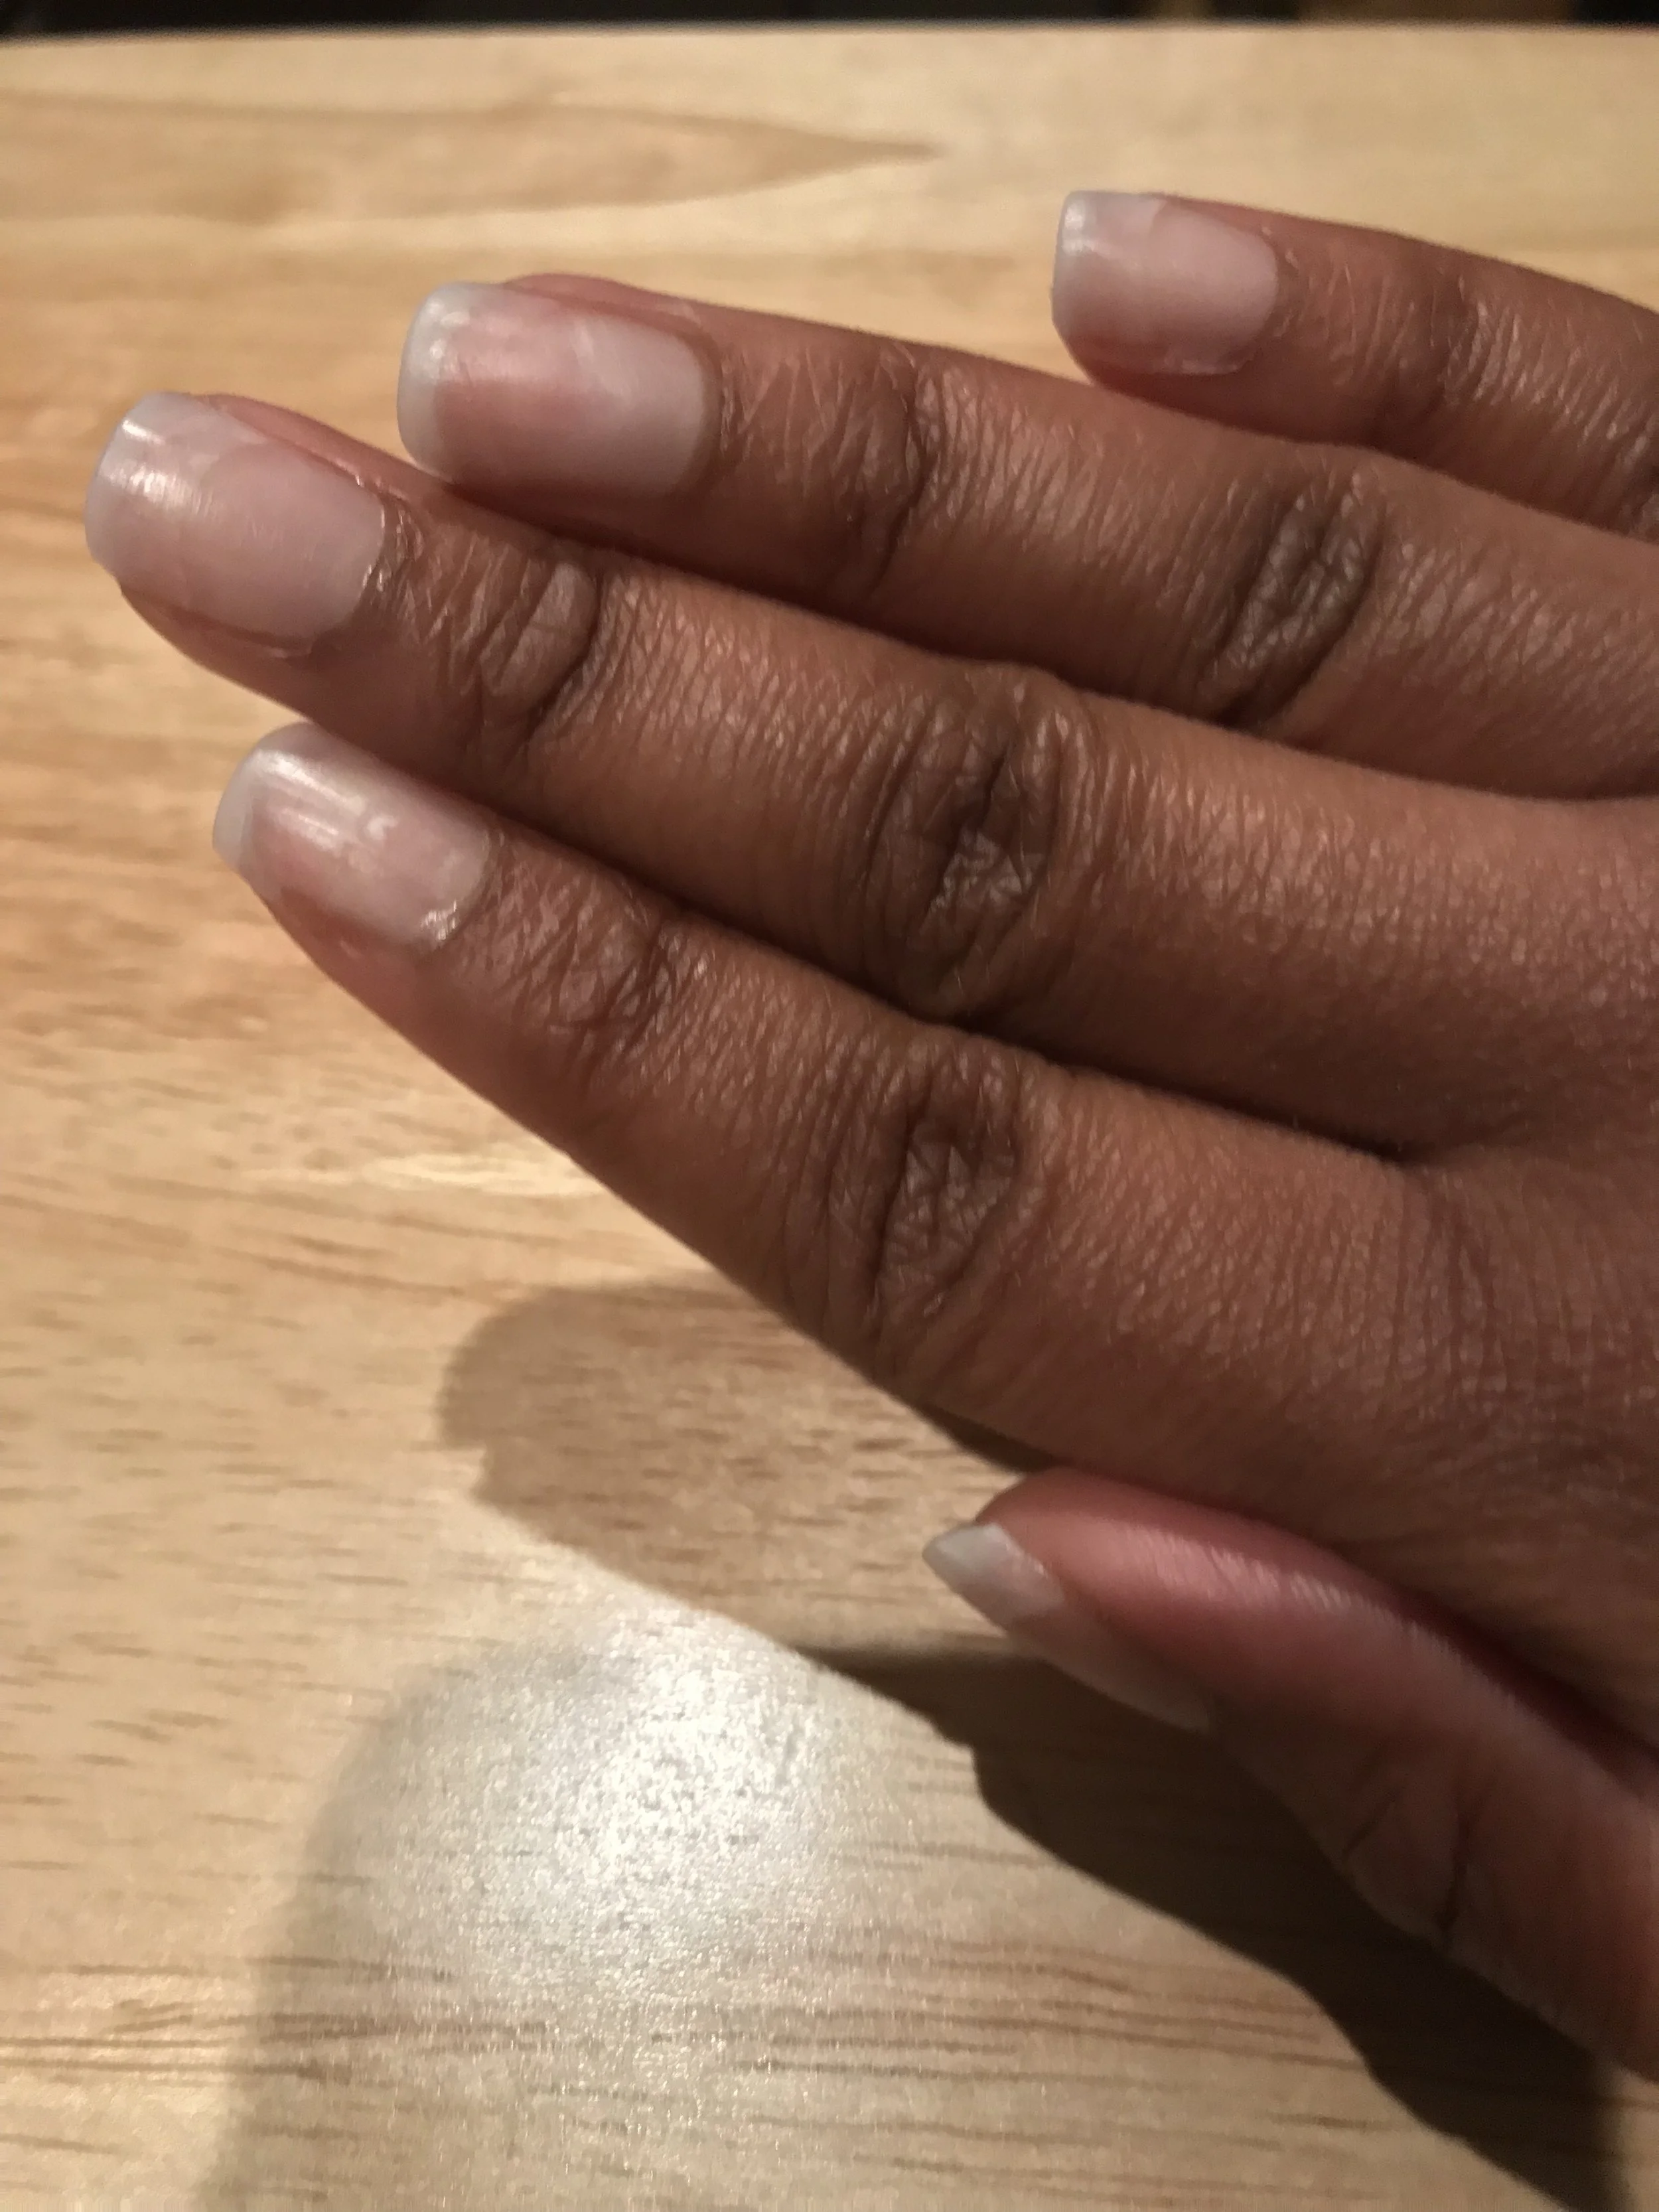
There are a few things that I did notice that I made note of that will give me better results next time. The shape of each nail isn’t even and they’re shaped differently and you can also see the nail extension underneath. So there are a few things that could have been better, but the good thing is, I tried it and I know how to handle it if I ever decide to do it again. I know these won’t last for more than a week, which I think is pretty good considering.
With more practice and better products, I'm sure I'll get better at doing it. It didn't take as much time as I thought it would have which is good and they kinda look like they could be my real nails. I'm a fan of the whole DIY thing. If you decide to give it a try, I suggest watching a few videos on YouTube videos or on Instagram, just to get a visual refresher guide on how to move forward.